“We have so much time and so little to do. Strike that, reverse it.” – Willy Wonka
Over the years, some of our loyal users have made a keen observation: while you can’t create more time, you may be able to use it more wisely if you could see your potentially infinite task list inside the regrettably finite space of your Google Calendar.
For those loyal users (and everyone else too), that day has finally arrived!
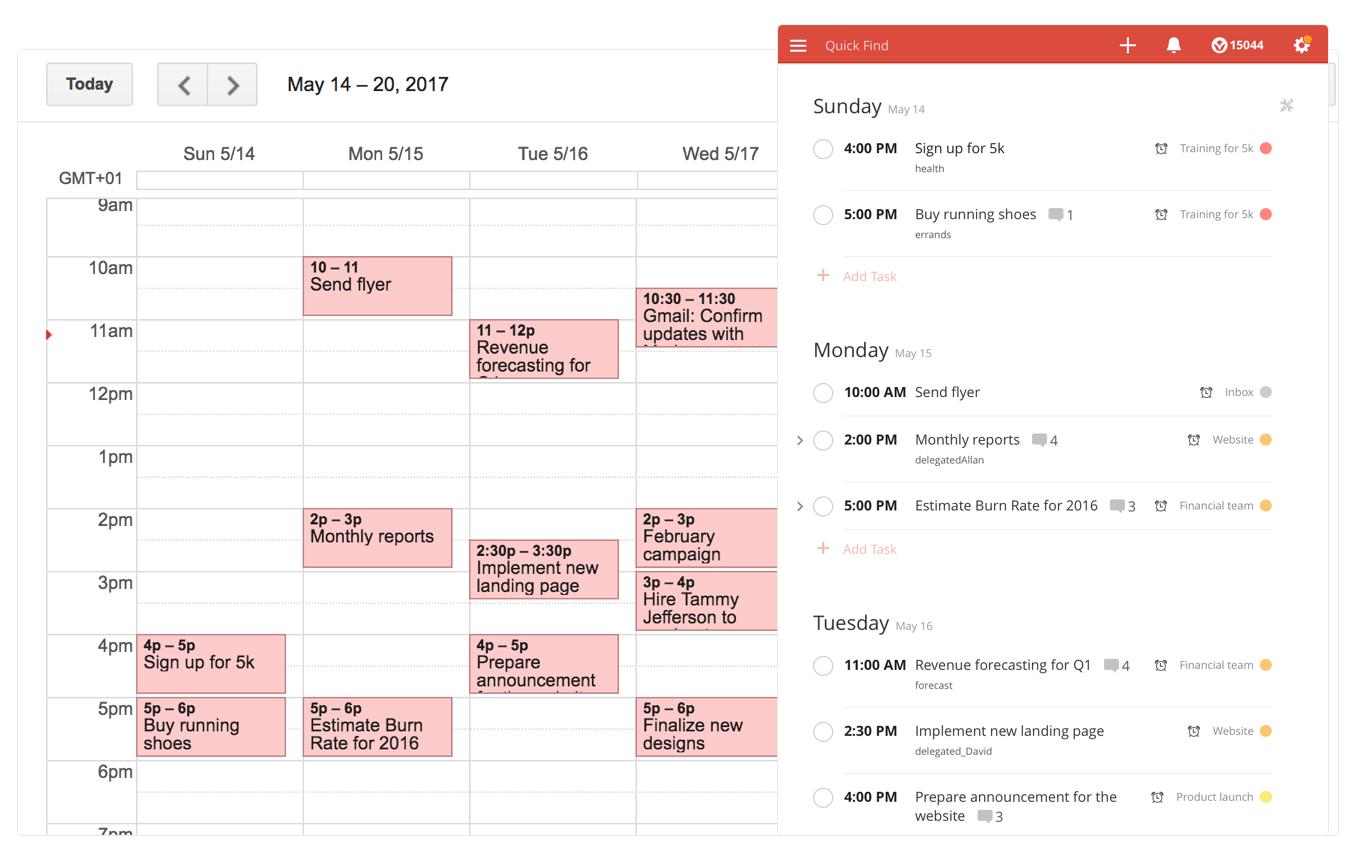
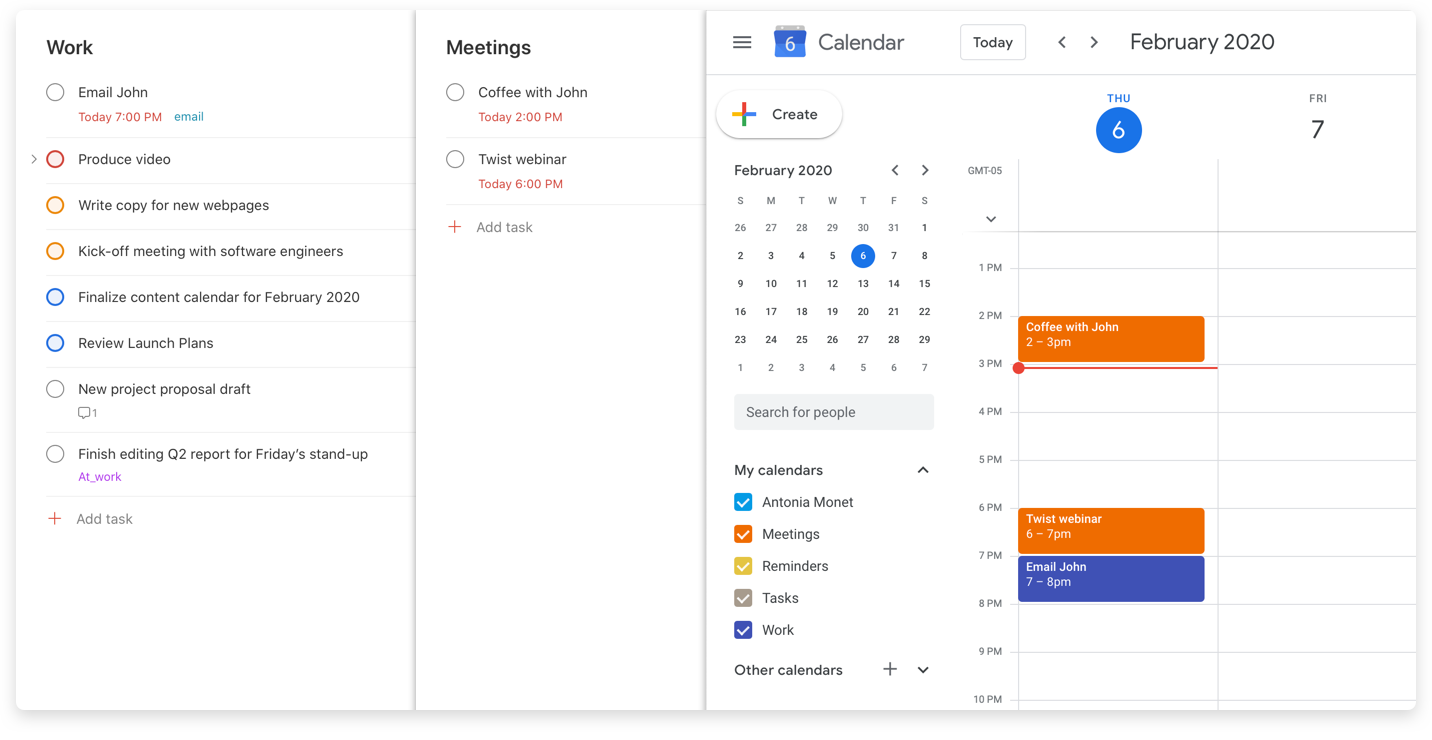
With a real-time, 2-way sync between Todoist and Google Calendar (yes, you read that right – real-time, 2-way), you’ll be able to visualize, organize, and prioritize your tasks from inside your calendar. Any changes you make in Google Calendar will instantly be reflected back in Todoist and vice versa:
- Get a clear overview of your tasks for the day, week, and month, neatly laid out inside your calendar.
- Plan out big projects in your calendar so you know you can hit each milestone on time.
- Focus on what’s most important by actually blocking off time for your tasks in your calendar.
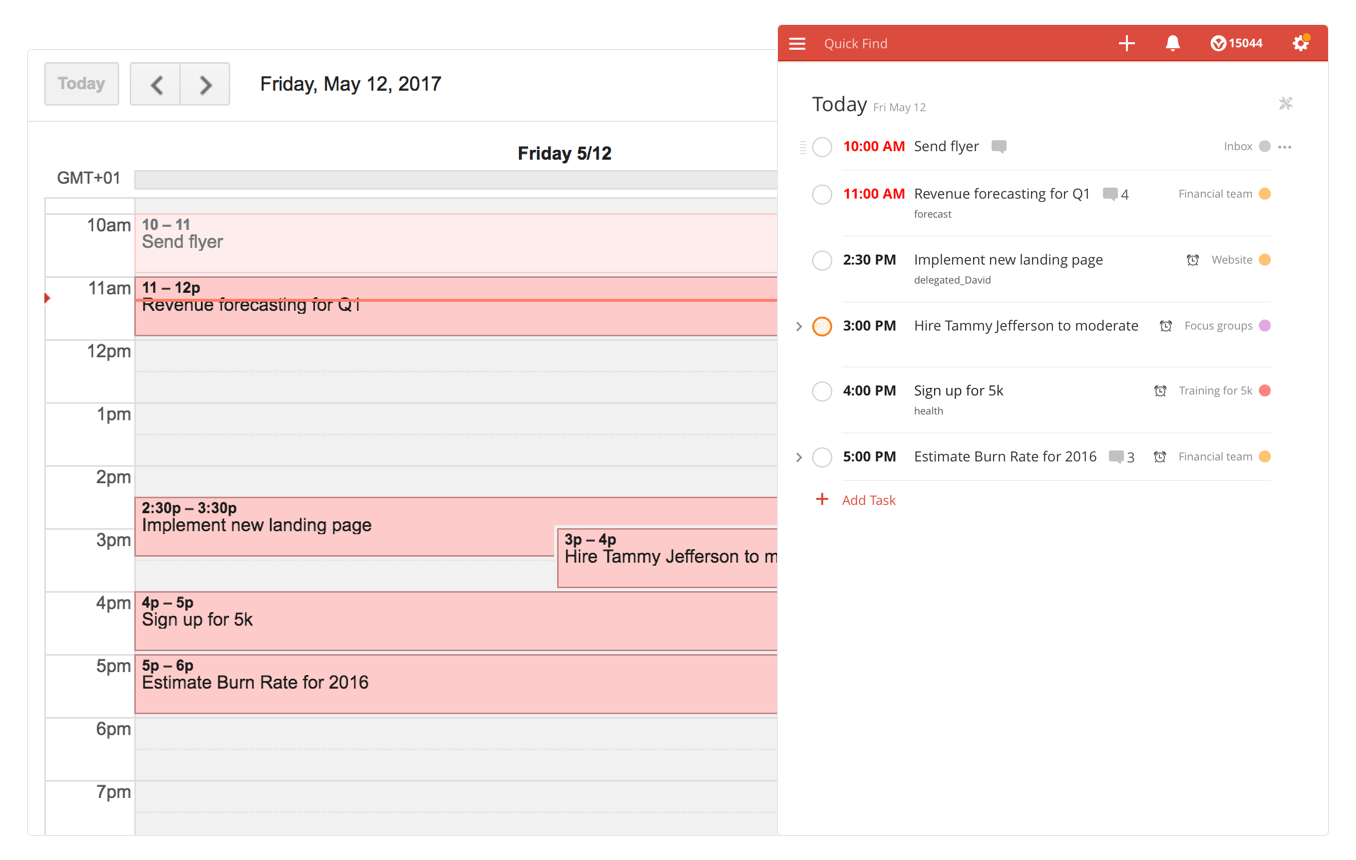
- Adjust your plan as you go – drag-and-drop events in your calendar and see the changed due dates instantly reflected back in your Todoist.
- Relax knowing that everything’s organized and accounted for 😎 🌴
How it works
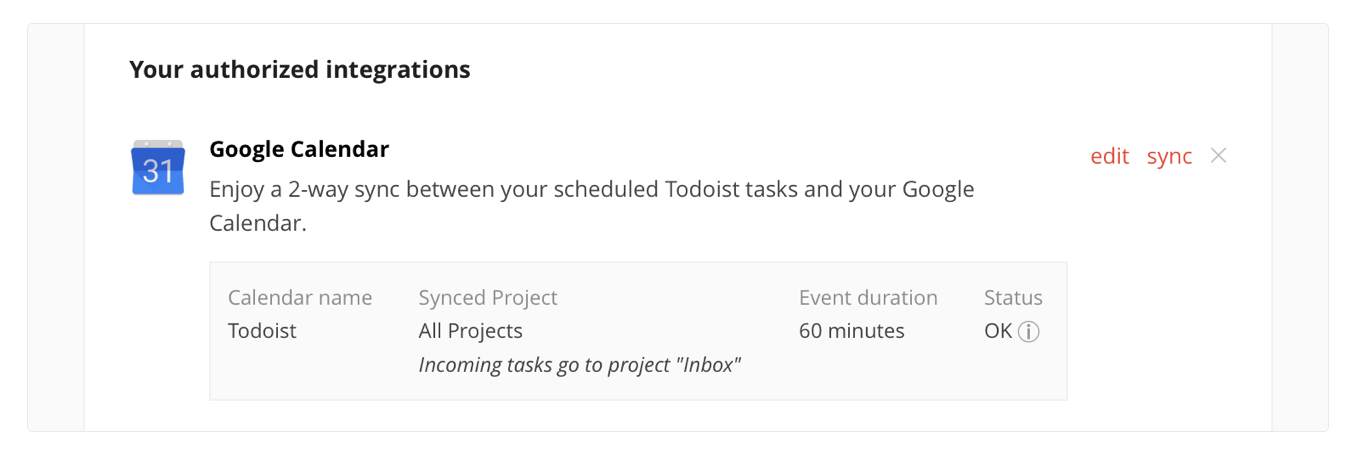
Once you authorize the integration, tasks with a due date and/or time in Todoist will automatically be added to a Google calendar of your choosing. (You can also choose to only sync tasks from a specific project.)
Likewise, any events created in that calendar will automatically be added to the Todoist project of your choosing.
Of course with a true 2-way sync, changes you make in Google Calendar — like editing an event name or changing the date — will instantly be reflected back in Todoist, and vice versa.
All tasks created from Google Calendar will have a default @gcal label. (You can change the label by editing the integration after you’ve connected the apps).
Connect Todoist to Google Calendar:
- Sign into the Todoist web app (this integration can only be authorized via the web app).
- Click on the gear icon in the upper-right and select Settings.
- Navigate to the Integrations tab.
- Click Connect next to Google Calendar.
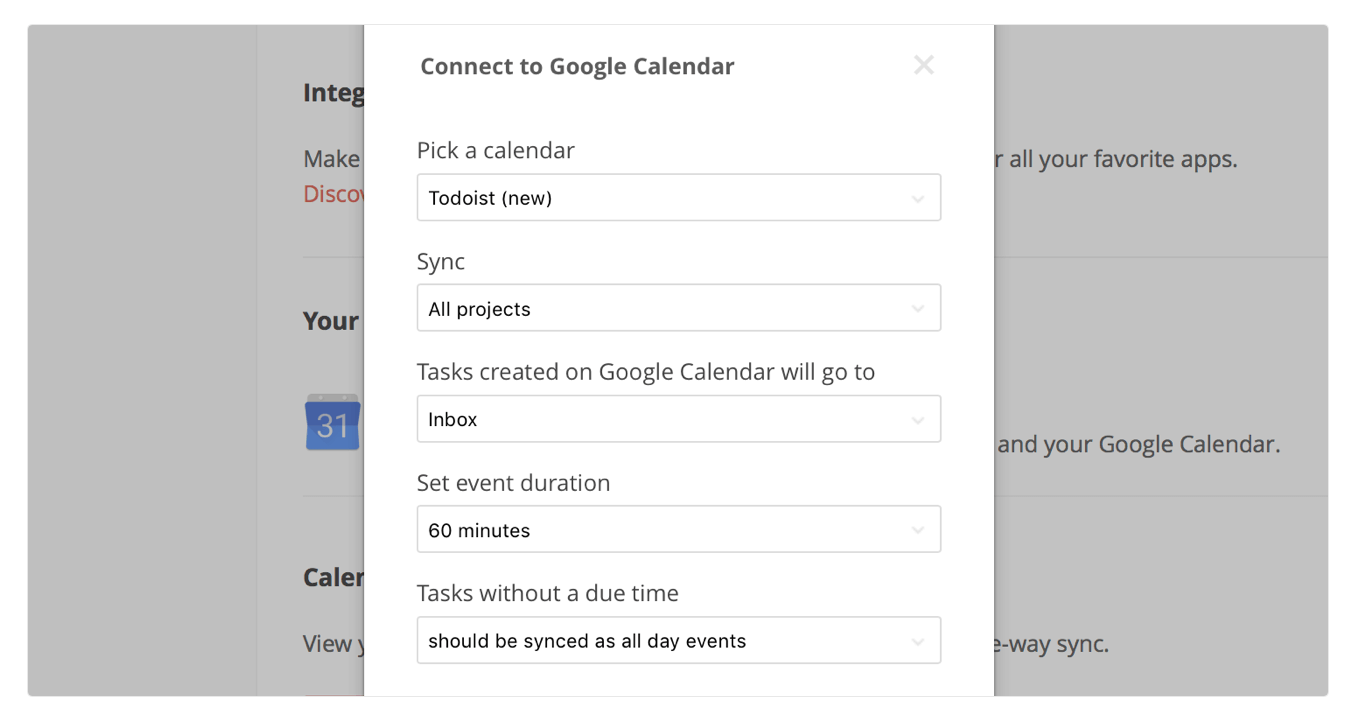
After signing into your Google account, you’ll be asked:
- Which calendar you want your tasks added to. You can choose one of your existing calendars, but we recommend creating a new one just for your Todoist tasks. That way you’ll be able to toggle them on and off in your calendar view or remove them from your Google Calendar entirely if you decide to stop the integration. Only events created in that calendar will be added as Todoist tasks.
- To sync your entire Todoist account or just a specific project. For example, you may have a Meetings or Content Calendar project that you want synced with Google Calendar, but nothing else. For now, you’ll only be able to sync one project this way. We may add support to select multiple projects to sync in the future.
- Which Todoist project you want new Google Calendar tasks added to. New events created in the connected calendar will automatically be added to this project. If you’re not sure which project to select, we recommend using your Todoist Inbox. You can always move the tasks to another project later.
- A default event duration. New Todoist tasks with a due date and time will show up in Google Calendar with this duration. You can always make changes to the event in Google Calendar once it’s created.
- Whether or not you want to sync tasks with a due date but no time. You can choose to sync these tasks as all day events in Google Calendar, or you can opt to only sync tasks with a due date and time.
Add multiple Todoist projects to Google Calendar
If you’ve got multiple Todoist projects that you want to keep track of in Google Calendar, that’s no problem. Just press Add calendar below your integration in your Todoist Integration settings, and you’ll add another integration.
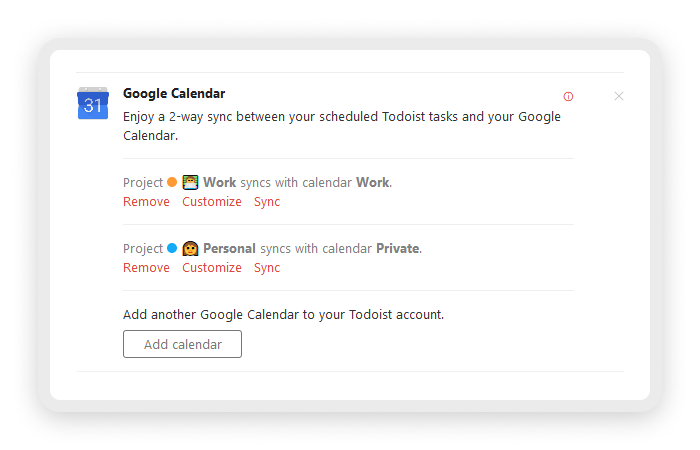
To keep multiple projects organized in Google Calendar, we recommend you pick a new calendar for each of your new integrations. That way, you have full control of what you want to see: You can simply toggle each calendar on and off so it doesn’t clutter up your Google Calendar.
We know many of you have been waiting a long time for this integration. If Karma points were measured by patience, you’d be enlightened 10 times over. 🙏
Once you’ve had a chance to try it out, we’d love to hear your feedback. Is it working like you expected? Is there something you’d like to add or change? Reach out at support.todoist.com or tweet us @todoist.